Here are the steps to follow when performing your Bank Reconciliation:
- On the Jewel Home Screen, click the NextStep button when it says Reconcile Bank Statements, or click Reconcile.
- You will see a list of accounts waiting to be reconciled. Those that still need to be reconciled this month will be in bold. Note that you can adjust the Statement Frequency for each bank account in Maintenance / Edit Accounts (and Never is an option, if you no longer wish the account to appear here).
-
Double-click on the account you are reconciling, or select the account and click Reconcile.
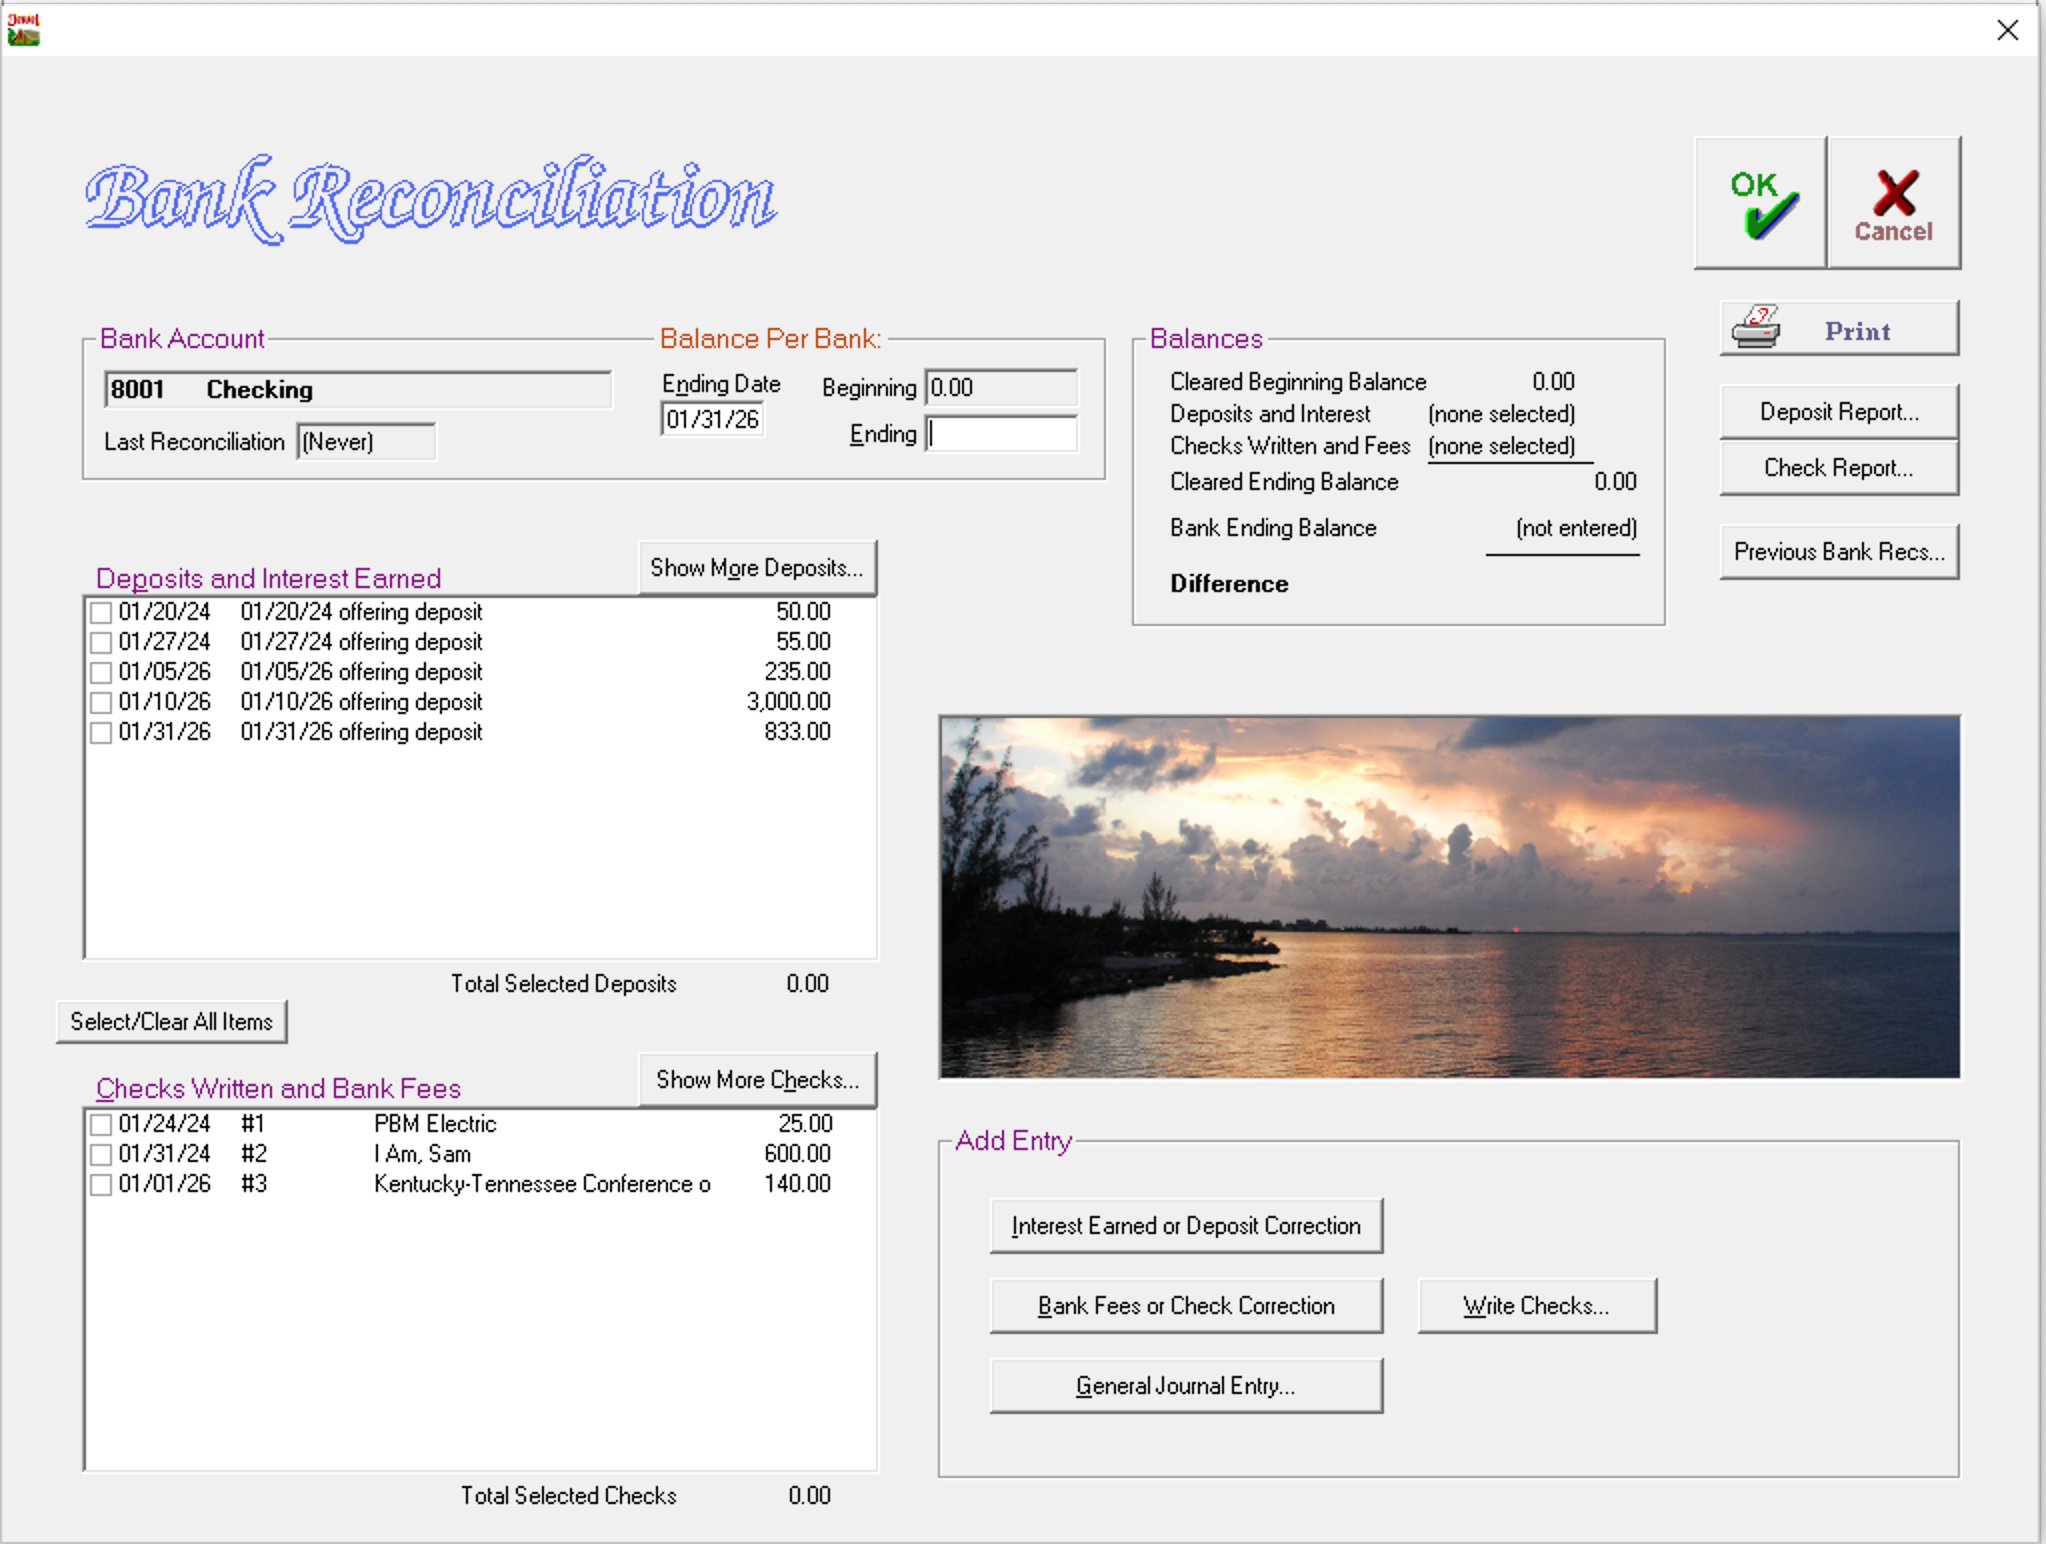
Let's take a moment to familiarize ourselves with the Bank Reconciliation screen. At the top left is the Bank Account box, with information that should match your Bank Statement. Under that is a list of Deposits and a list of Checks that have been recorded in Jewel. Only transactions up to the Ending Date are shown here. If you wish to see later transactions, click "Show More Deposits" or "Show More Checks", just above each list.
Back at the top, toward the right, is the "Balances" box. The top number matches your Bank Beginning Balance. The next two numbers give the totals of the items you have checked off in Jewel. The Cleared Ending Balance is calculated by adding the deposits to the Cleared Beginning Balance and then subtracting the checks. Your goal is to make the Cleared Ending Balance match the Bank Ending Balance. When it does, the Difference at the bottom of that box will be $0 and your Bank Reconciliation will be completed.
The Add Entry box at the bottom contains shortcuts for entering interest, bank fees, corrections, and other forgotten entries. Keep reading for instructions on how to use them.
And lastly, the row of buttons at the top right contains a button to print your reconciliation-in-progress (sometimes seeing it on paper can help find mistakes), your deposit, check, and bank rec reports (all useful for finding transactions), and Undo Last Reconciliation.
Now let's continue:
- Look at your Bank Statement and find the Ending Date. Make sure it matches the Ending Date pre-filled in Jewel. If the difference is only a few days, correct the date in Jewel. If Jewel's date is in the wrong month, figure out why by looking at Previous Bank Recs or contact technical support for help.
- Look at your Bank Statement and find the Beginning Balance for this period. Make sure that it matches the Beginning balance pre-filled in Jewel. If not, contact technical support for help.
- Look at your Bank Statement and find the Ending Balance for this period. Enter this amount in the Ending text box.
- Compare the transactions on your Bank Statement to the transactions in Jewel. Every transaction on your bank statement should be recorded in Jewel, exactly as it appears on your bank statement. Work your way down the bank statement, matching each transaction with a corresponding transaction in Jewel, and checking off each transaction in Jewel as you find it.
- If a transaction should match but doesn't, then Jewel must be corrected. Follow the link to instructions for specific corrections here, remembering that the Bank Reconciliation screen has shortcuts to the Check and Deposit reports, to Write Checks, and to Make General Journal entry, which can help make corrections faster.
- If a transaction on the bank statement is missing from Jewel, it must be added. Follow the link to instructions for adding missing transactions here.
- When you have checked off a corresponding entry in Jewel for each and every transaction on the bank statement, the "Difference" will be $0.00. Click OK to complete the Bank Reconciliation and print your Bank Reconciliation Report.
- Repeat for each bank account needing reconciliation. Then, if you are closing the month, click Finished All Bank Reconciliations to proceed to the next step. Otherwise, click "Close" to return to the Jewel Home Screen.
If you wish to leave the reconciliation at any point before reaching a Difference of $0.00, click Cancel, then Yes to save your work.
If you are struggling to get that difference to $0, try the tricks listed here.
Click here for more topics related to Quick Start Guide to Using Jewel